Nothing ruins a perfect ride faster than the hiss of escaping air and that sinking feeling when your tire goes flat miles from home. I have been there more times than I care to count, standing on the side of a winding road with grease-stained hands and a growing sense of frustration.
The debate between tubeless vs tubed bike tires has become one of the most discussed topics in cycling circles over the past decade. Whether you are a weekend warrior, a competitive triathlete, or a daily commuter, choosing the right tire system affects your ride quality, maintenance burden, and peace of mind on every outing.
In this guide, I will walk you through everything you need to know about tubeless and tubed tires. You will learn how each system works, the real pros and cons based on thousands of miles of riding experience, and exactly which setup makes sense for your specific riding style. By the end, you will have a clear answer to the question that has puzzled cyclists for years.
Table of Contents
What Are Tubeless and Tubed Bike Tires?
Before diving into comparisons, let me explain how each tire system actually works. Understanding the fundamentals helps you make an informed decision rather than following cycling trends blindly.
How Tubed Bike Tires Work
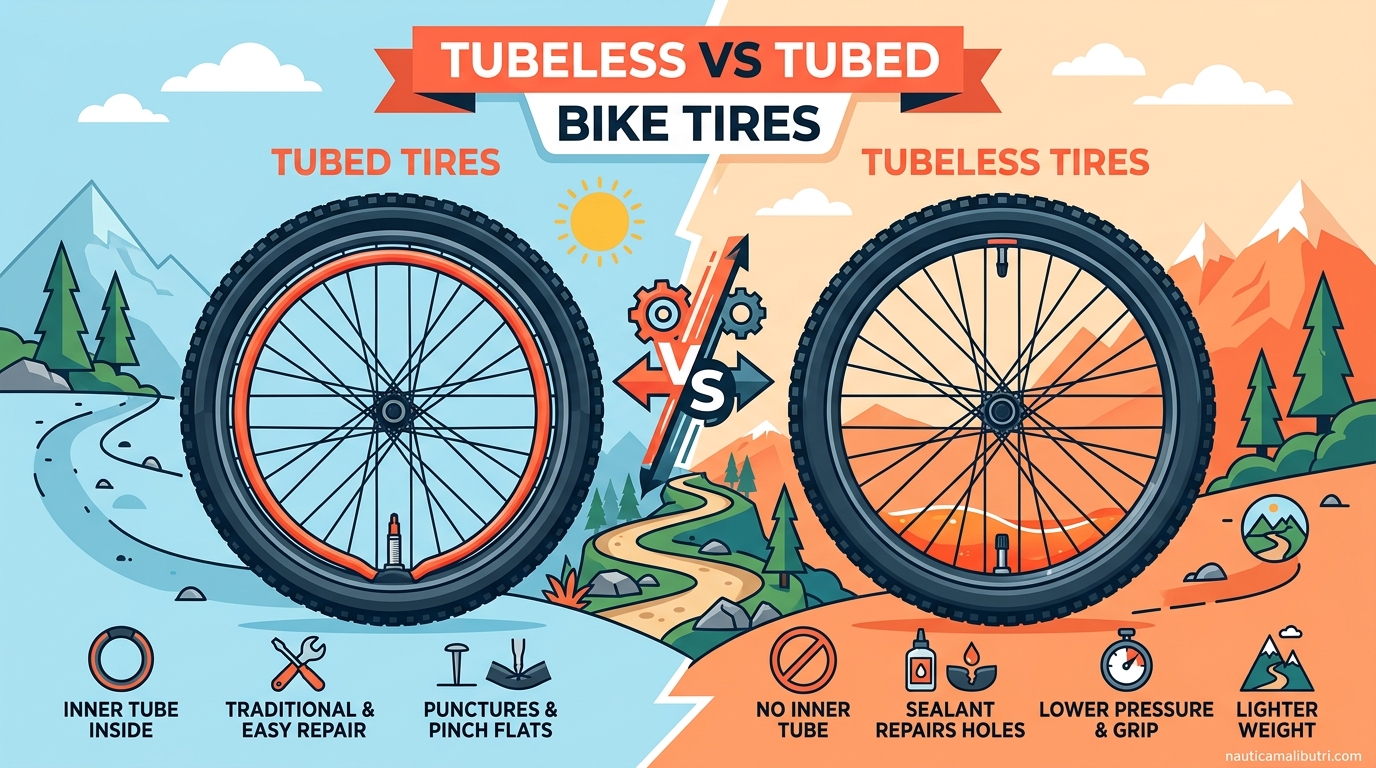
Traditional tubed bike tires use a separate inner tube that sits between your tire and rim. The tire itself does not hold air; it simply provides the tread, sidewalls, and shape. The butyl rubber or latex inner tube inflates and presses the tire bead against the rim hook, creating an airtight seal.
When you get a puncture, air escapes from the tube through the hole in the tire. Flats typically require either patching the tube or replacing it entirely with a spare you carry on your ride. This system has been the standard for over a century because it is simple, reliable, and universally understood.
How Tubeless Bike Tires Work
Tubeless tires eliminate the inner tube entirely. Instead, the tire itself creates an airtight seal directly against a specially designed rim using liquid sealant inside the tire cavity. The sealant sloshes around as you ride, ready to plug small punctures instantly when they occur.
The tire bead must seat firmly into the rim bed to create the initial seal. This requires tubeless-ready rims with specific bead hook designs, tubeless tape covering the spoke holes, and a tubeless valve stem. The sealant contains latex particles and other compounds that coagulate when exposed to air, automatically sealing holes up to about 6mm in diameter.
Key Terminology You Should Know
TLR (Tubeless Ready): Most modern tubeless systems use this standard. TLR tires and rims are designed to work together but require sealant to create an airtight seal. This is the most common setup for road, gravel, and mountain bikes 2026.
UST (Universal System Tubeless): An older standard developed by Mavic that uses a specific rim bed shape and tire bead design. UST tires can seal without sealant, though most riders still add it for puncture protection.
Clincher: The technical term for traditional tubed tires that “clinch” onto the rim with bead wires. Most road bikes and hybrids use clincher tires with inner tubes.
Pinch Flat (Snake Bite): A type of flat that occurs when the tire compresses against the rim, pinching the tube and creating two small holes that resemble a snake bite. This is the most common flat type for tubed tires running low pressure.
Burping: When a tubeless tire momentarily loses its bead seal during hard cornering or impacts, releasing a burst of air and sealant. Modern TLR systems have largely eliminated this issue with better rim and tire designs.
Tubeless vs Tubed: Pros and Cons at a Glance
Sometimes you need the quick summary before diving into details. Here is how the two systems compare across the factors that matter most to riders.
Tubeless Tires: Better puncture protection, self-sealing capability, ability to run lower pressure for improved traction and comfort, slightly lower rolling resistance, and weight savings at the outer wheel edge. Higher initial cost, more complex installation, ongoing sealant maintenance, and messy when major repairs are needed.
Tubed Tires: Simple installation and maintenance, lower upfront cost, easy to repair with standard tools, predictable reliability, and quick roadside fixes with a spare tube. More prone to pinch flats, higher rolling resistance, less traction at lower pressures, and slightly heavier rotating weight.
One rider on Reddit summed it up perfectly: “Tubeless equals messy, lighter, lower pressure. Tubes equals easier to install.” That tradeoff captures the essential decision every cyclist faces.
Advantages of Tubeless Tires
I switched to tubeless on my gravel bike three years ago after suffering three flats on a single 60-mile ride. The difference has been transformative for my riding experience. Here are the specific benefits that make tubeless worth considering.
Better Puncture Protection and Self-Sealing
This is the headline feature that sells most riders on tubeless. The sealant inside your tire actively seeks and plugs small punctures as you ride. You might hear a brief “hiss” when something sharp penetrates, then silence as the sealant does its job.
As one cyclist reported after 15,000 miles of tubeless riding: “3-4 punctures sealed without me even stopping. That is the biggest plus.” Small holes from thorns, glass shards, and metal debris that would end a tubed ride become minor annoyances you might not even notice.
Even larger punctures that overwhelm the sealant can often be repaired with a plug kit without removing the wheel. You simply insert a sticky bacon strip into the hole, reinflate, and continue riding. This beats the traditional process of removing the wheel, tire, tube, patching or replacing, and reinstalling everything.
Lower Tire Pressure for Better Traction
Without an inner tube to pinch between the tire and rim, you can safely run lower tire pressure on tubeless setups. This translates to better grip, especially on rough surfaces, gravel, and technical trails.
On my tubeless gravel bike, I run 35-40 PSI depending on conditions. With tubes, I would need 45-50 PSI to avoid pinch flats on the same terrain. That 10-15 PSI difference dramatically improves comfort and cornering confidence.
Mountain bikers see even bigger benefits. Many run 18-25 PSI tubeless on technical trails where tubed riders need 30+ PSI. The tire conforms to obstacles rather than bouncing off them, maintaining momentum and control.
Reduced Rolling Resistance
At first glance, tubeless tires seem like they would have higher rolling resistance because of the sealant coating the inside. However, the opposite is true. The flexible tire casing without an inner tube creates less friction as it deforms over road imperfections.
Independent testing consistently shows tubeless tires rolling 5-10 watts faster at typical riding speeds. That might sound small, but over a 100-mile ride or during a time trial, the energy savings add up. For competitive cyclists and triathletes, this performance edge matters.
Weight Considerations
The weight comparison surprises many riders. A standard butyl inner tube weighs 100-150 grams. Latex tubes drop to 50-80 grams but require daily inflation and are fragile. Tubeless sealant adds 30-50 grams per tire, but you eliminate the tube entirely.
The real advantage is rotational weight at the outer edge of your wheel. Every gram at the rim affects acceleration more than weight at the hub or frame. Tubeless setups save weight exactly where it matters most for snappy handling and climbing.
Disadvantages of Tubeless Tires
As someone who has spent many evenings cursing at a garage floor covered in sealant, I can tell you tubeless is not all sunshine and speed. The drawbacks are real and significant for certain riders.
Higher Initial Cost
Going tubeless requires an investment. You need tubeless-ready tires ($50-90 each), tubeless tape ($15-25), valve stems ($10-20 per pair), and sealant ($10-15 per bottle). If your rims are not tubeless-ready, you might need new wheels entirely.
For a complete setup on both wheels, expect to spend $150-250 beyond what quality tubed tires would cost. Some riders amortize this over years of riding, but the upfront hit is undeniable.
More Complex Installation
Mounting tubeless tires ranges from mildly annoying to genuinely difficult. The tire bead must seat firmly into the rim bed to create an airtight seal. This often requires a high-volume pump or air compressor for the initial inflation.
I have spent 45 minutes wrestling with stubborn tires that refused to seat, only to have sealant spray across my garage when the bead finally popped into place. Experienced mechanics develop tricks and techniques, but beginners often struggle. As one forum user admitted: “Once you get the hang of seating new tires, it is not too bad.” The learning curve is real.
Tight tire and rim combinations might require tire levers, soapy water, or even removal of the valve core to get enough airflow. Some riders give up entirely and pay bike shops for installation.
Maintenance Requirements
Tubeless tires need ongoing attention that tubed tires do not. The sealant dries out over time, typically requiring refresh every 3-6 months depending on climate and riding conditions. In hot, dry climates, you might need to top up sealant every 2-3 months.
You also need to check tire pressure more frequently. While tubeless holds air reasonably well, the initial seal can be imperfect and small air loss is normal. Many riders develop the habit of topping off pressure before every ride.
If you ignore sealant maintenance, you will discover the problem at the worst possible moment: when a puncture occurs and no liquid sealant remains to plug it.
Sealant Mess and Hassle
When tubeless goes wrong, it goes really wrong. Major punctures that overwhelm the sealant create a sticky, smelly mess. The latex-based sealant sprays everywhere and bonds to surfaces. Your hands, clothes, and bike frame get coated in the stuff.
Some riders eventually return to tubes because of this hassle factor. One cyclist noted: “Some riders went back to tubes due to seating difficulty and maintenance hassle.” The convenience tradeoff is not worth it for everyone, especially casual riders who prioritize simplicity over marginal performance gains.
When to Choose Tubed Tires
Despite all the tubeless hype, traditional tubed tires remain the right choice for many riders. Do not let cycling industry marketing pressure you into a system that does not match your needs.
Simplicity and Reliability
Tubed tires work the same way they have for decades. Everyone understands them. Every bike shop stocks tubes and knows how to fix them. When you get a flat, the repair process is straightforward and predictable.
Inner tubes are also surprisingly reliable when used correctly. Running appropriate pressure for your weight and terrain eliminates most pinch flats. Quality tires with puncture protection belts reduce the risk of debris punctures significantly.
Lower Maintenance Burden
If you prefer to spend your time riding rather than maintaining your bike, tubes have a clear advantage. Install them, inflate them, and ride. Check pressure weekly and replace tubes when they wear out or puncture. That is it.
No sealant to refresh, no beads to reseat, no messy repairs to worry about. For commuters and casual riders who value reliability over marginal performance gains, this simplicity is compelling.
Best Use Cases for Tubes
Commuters: Predictable reliability matters more than speed when you need to get to work on time. Tubes are faster to fix if you do get a flat.
Casual road riders: If you ride smooth roads at moderate speeds, the performance benefits of tubeless are minimal. The cost and complexity are not justified.
Riders without mechanical confidence: If you cannot fix a flat on the roadside with confidence, tubeless adds another layer of complexity when things go wrong.
Riders with non-tubeless wheels: Converting standard rims to tubeless works sometimes but often creates more problems than it solves. If your wheels are not tubeless-ready, stick with tubes.
Triathlon-Specific Considerations
This section addresses a gap I noticed while researching: none of the major competitors discuss triathlon-specific factors for tubeless vs tubed decisions. As a triathlon-focused site, we should fill that void.
Race Day Reliability Concerns
Triathlons present unique challenges. You cannot accept mechanical help on the bike course (except at designated aid stations). A flat tire 20 miles from the next support point means fixing it yourself or walking.
Tubeless self-sealing offers obvious appeal here. Small punctures that would end a tubed rider’s race might be non-events on tubeless tires. However, catastrophic failures that overwhelm sealant become bigger problems. You cannot simply install a spare tube in a tubeless tire without removing the old sealant mess first.
Many experienced triathletes carry a spare tube and tire levers even when running tubeless, effectively preparing for both scenarios. This adds weight but provides backup options.
Time Trial Advantages
For time trial and non-drafting triathlon events, rolling resistance matters enormously. The 5-10 watt savings from tubeless tires translate directly to faster split times. Over a 40K bike leg, this could mean 30-60 seconds saved.
At the elite level, every second counts. This is why professional triathletes and time trial specialists have largely adopted tubeless systems despite the maintenance overhead. The performance advantage is real and measurable.
Course Condition Factors
Consider your typical race courses when deciding. Rough, chip-seal roads favor tubeless for comfort and puncture protection. Smooth, pristine asphalt reduces the tubeless advantage.
Gravel triathlons and off-road events strongly favor tubeless. The ability to run lower pressure without pinch flats is essential on loose surfaces. Triathletes racing Xterra or gravel events should view tubeless as nearly mandatory.
Recommendations for Triathletes
For IRONMAN and long-course racing: Tubeless makes sense for the puncture protection alone. Carry a spare tube as backup. Practice roadside repairs before race day.
For Olympic and sprint distance: Either system works. If you prioritize simplicity, quality tubed tires with puncture protection are perfectly adequate for these shorter events.
For time trials: Tubeless is becoming the standard. The rolling resistance advantage is too significant to ignore for competitive age-groupers.
How to Choose: Tubeless or Tubed?
The decision ultimately depends on your specific situation. Let me break down the decision factors by category to help you choose confidently.
By Riding Style
Mountain Biking: Go tubeless. The puncture protection, ability to run low pressure, and self-sealing capability are essential for technical terrain. Almost no serious mountain bikers use tubes anymore.
Gravel Riding: Strongly recommend tubeless. Rough roads, sharp rocks, and thorns make tubes frustrating. The comfort and traction benefits of lower pressure are substantial on gravel.
Road Cycling (Performance): Tubeless is increasingly standard. The rolling resistance advantage and puncture protection justify the complexity for serious riders.
Road Cycling (Casual): Tubes are fine. If you ride smooth roads and value simplicity, there is no shame in staying with traditional setups.
Commuting: Tubes typically win for reliability and ease of roadside repair. However, tubeless with good sealant works well if you are comfortable maintaining it.
By Budget Considerations
If budget is tight, tubes offer excellent value. Quality tires with puncture protection cost significantly less than complete tubeless setups. You can always upgrade later when finances allow.
That said, factor in the cost of tubes over time. A $5 tube replacement every few months adds up. If you ride frequently in puncture-prone areas, tubeless might pay for itself through avoided tube purchases and roadside repairs.
By Mechanical Comfort Level
Be honest about your mechanical skills. Can you confidently fix a flat on the roadside? Do you enjoy working on your bike, or does it stress you out?
If mechanical work intimidates you, tubes offer a gentler learning curve. The installation is simpler, and roadside repairs are more straightforward. You can always upgrade to tubeless later as your confidence grows.
If you are mechanically inclined, tubeless installation is just another skill to master. The maintenance becomes routine quickly.
By Local Riding Conditions
Consider your specific environment. Riders in the American Southwest deal with goat head thorns that make tubeless nearly essential. Urban commuters in clean cities might rarely puncture either way.
Rough roads with potholes and debris favor tubeless for pinch flat prevention. Smooth bike paths make the protection advantage irrelevant.
As one experienced rider advised: “If you ride 50+ miles in no-man’s land, tubeless is a more robust setup.” Remote riding justifies the complexity for the reliability benefits.
Installation and Maintenance Guide
Whether you choose tubeless or tubed, proper setup and maintenance ensure reliable performance. Here are the essential practices for each system.
Tubeless Setup Basics
Step 1: Verify compatibility. Ensure your rims are tubeless-ready and your tires specify TLR or tubeless compatibility. Mixing incompatible components creates frustration.
Step 2: Install tubeless tape if not already present. This covers the spoke holes and creates an airtight rim bed. Apply carefully without wrinkles or bubbles.
Step 3: Install the tubeless valve stem through the rim tape. Tighten the locking nut snugly but do not overtighten and damage the rim.
Step 4: Mount one tire bead onto the rim. Add the recommended amount of sealant (typically 30-50ml per tire). Mount the second bead.
Step 5: Inflate rapidly to seat the beads. A compressor or high-volume pump works best. You should hear two pops as the beads seat into place.
Step 6: Shake and rotate the tire to distribute sealant. Check for leaks by listening and looking for bubbles in soapy water.
Tubed Setup Basics
Step 1: Partially inflate the tube to give it shape. Insert the valve through the rim hole.
Step 2: Work one tire bead onto the rim starting opposite the valve.
Step 3: Work the second bead onto the rim. Use tire levers only if necessary to avoid pinching the tube.
Step 4: Inflate partially and check that the tube is seated evenly. The tire should sit uniformly in the rim bed.
Step 5: Inflate to riding pressure. Check again that the tire spins true without wobbling.
Sealant Refresh Schedule
Mark your calendar for sealant maintenance. Most manufacturers recommend checking and topping off sealant every 3-4 months. In hot, dry climates, do this every 2-3 months.
To check sealant levels, remove the valve core and insert a zip tie or dipstick. The sealant should pool at the bottom of the tire in a visible liquid layer. If it is dry or nearly dry, add fresh sealant.
When refreshing, you can usually add fresh sealant through the valve without removing the tire. Remove the valve core, inject sealant with a syringe, and replace the core.
Emergency Repairs
For tubed tires: Remove the wheel, tire, and tube. Find the puncture. Either patch the tube with a glueless patch or install your spare tube. Reinstall and inflate.
For tubeless tires: First, try spinning the wheel to distribute sealant to the puncture. If the hole is too large for sealant alone, use a plug kit. Insert the sticky plug into the hole, pull it out slightly to fill the cavity, and trim excess. Reinflate.
If the tire is badly cut or the bead has unseated, you may need to install a tube as a backup. Remove the valve stem, insert a tube, and proceed as with a tubed tire repair. Note that sealant will make this process messy.
Tubeless vs Tubed Bike Tires: FAQ
Is tube or tubeless better for a bike?
Neither is universally better. Tubeless excels for mountain biking, gravel riding, and performance road cycling where puncture protection and lower rolling resistance matter. Tubed tires work perfectly well for casual riding, commuting, and anyone prioritizing simplicity and lower maintenance. The best choice depends on your riding style, terrain, and mechanical comfort level.
Do professional cyclists use tubeless tires?
Yes, most professional road cyclists, triathletes, and mountain bikers now use tubeless tires in competition. The performance benefits, particularly reduced rolling resistance and self-sealing puncture protection, outweigh the maintenance complexity at the elite level. However, some professionals still prefer tubular tires for specific events like cobbled classics.
What are the downsides to tubeless tires?
The main disadvantages include higher initial cost for tubeless-ready components, more difficult installation requiring special tools or techniques, ongoing sealant maintenance every 3-6 months, mess when major repairs are needed, and the need to carry a spare tube as backup for catastrophic failures. Some riders find the maintenance burden outweighs the benefits for casual use.
Can I drive a tubeless tire without air?
No, you should not ride a tubeless tire that has lost air. Without pressure, the tire bead can unseat from the rim, causing the tire to slip off entirely. This creates a dangerous situation where you could damage the rim, lose control, or crash. If your tubeless tire loses air, stop immediately and repair or replace it before continuing.
How often should I refresh tubeless sealant?
Refresh tubeless sealant every 3-6 months depending on climate and usage. In hot, dry conditions, check every 2-3 months. In cooler, humid climates, you might stretch to 4-6 months. Remove the valve core and check sealant levels with a zip tie or dipstick. Add fresh sealant when the liquid pool at the bottom of the tire becomes shallow or dried out.
Can I use an inner tube in a tubeless tire?
Yes, you can install an inner tube in a tubeless tire as a backup repair method. Remove the tubeless valve stem, insert a standard tube, and proceed with normal installation. This is messy because of the remaining sealant, but it works in emergencies when the tire has a cut too large to seal. Many tubeless riders carry a spare tube for this reason.
Why do tubeless tires lose air overnight?
Minor air loss is normal for tubeless tires, especially new setups that are still settling in. The sealant needs time to find and plug tiny air pathways between the tire and rim. Expect to top off pressure before rides for the first few weeks. If air loss continues beyond that, check for leaks at the valve stem, bead seat, or tire sidewalls using soapy water.
Conclusion
The tubeless vs tubed bike tires debate does not have a universal winner. Both systems have earned their place in cycling for good reason. Your choice should reflect your specific needs, not marketing hype or peer pressure.
Tubeless tires offer superior puncture protection, lower rolling resistance, and the ability to run lower pressures for better traction and comfort. These benefits come with higher cost, trickier installation, and ongoing maintenance requirements. They are the right choice for mountain bikers, gravel riders, performance-focused road cyclists, and anyone riding in puncture-prone conditions.
Tubed tires deliver simplicity, reliability, and ease of maintenance that many riders value above marginal performance gains. They work excellently for commuting, casual road riding, and anyone who prefers predictable reliability over incremental improvements.
For triathletes specifically, the decision balances race-day reliability against performance advantages. Long-course athletes benefit most from tubeless puncture protection. Short-course racers can comfortably use either system. Time trial specialists should lean tubeless for the rolling resistance advantage.
Whatever you choose, the best tire system is the one that gets you riding more often with greater confidence. Both tubeless and tubed bike tires have carried millions of cyclists to their goals. Pick the option that fits your riding style, maintain it properly, and focus on enjoying the miles ahead.