Picture this: you have just finished the swim portion of your first triathlon. Your heart is racing, your legs feel like jelly, and now you need to strip off your wetsuit, find your bike, and get moving again. Without proper triathlon transition setup tips, this moment can turn into chaos.
I learned this the hard way at my first sprint triathlon in [cy-1]. I spent four minutes fumbling with my wetsuit zipper and could not find my bike among hundreds of identical racks. Those four minutes cost me a podium spot in my age group. Since then, I have practiced, refined, and tested transition techniques across 15+ races.
This guide covers everything you need to know about T1 and T2 transitions. You will learn how to set up your transition area, execute smooth swim-to-bike and bike-to-run changes, and save precious minutes without adding extra training hours.
Table of Contents
Understanding Triathlon Transitions: T1 and T2 Explained
A triathlon transition is the process of changing gear and equipment between the three disciplines: swim, bike, and run. Every triathlon has two transitions: T1 (swim to bike) and T2 (bike to run).
T1 happens after you exit the water. You remove your swim gear, put on your bike gear, and head out on the bike course. T2 occurs after the bike leg. You rack your bike, switch to running gear, and start the final run portion.
Smooth transitions can save 2-5 minutes off your total time. Unlike fitness gains, which require months of training, transition efficiency comes from smart preparation and practice. A beginner with excellent transitions can beat a fitter athlete who fumbles in the transition area.
Pre-Race Transition Area Setup: Your Foundation for Success
The transition area is where all your gear lives during the race. Most races assign bike racks by age group or race number. Arrive early on race morning to claim your spot and set up properly.
Start by walking through the entire transition flow. Enter from the swim exit, find your bike rack, then trace the path to the bike mount line. Return through the bike entrance, find your rack again, and exit toward the run course. This mental map prevents confusion when your brain is oxygen-deprived.
Look for landmarks near your bike rack. Count the number of racks from the swim entrance. Find a distinctive sign, tree, or banner you can spot quickly. One triathlete told me they tied a bright pink ribbon to their rack after spending 90 seconds searching for their bike at their first race.
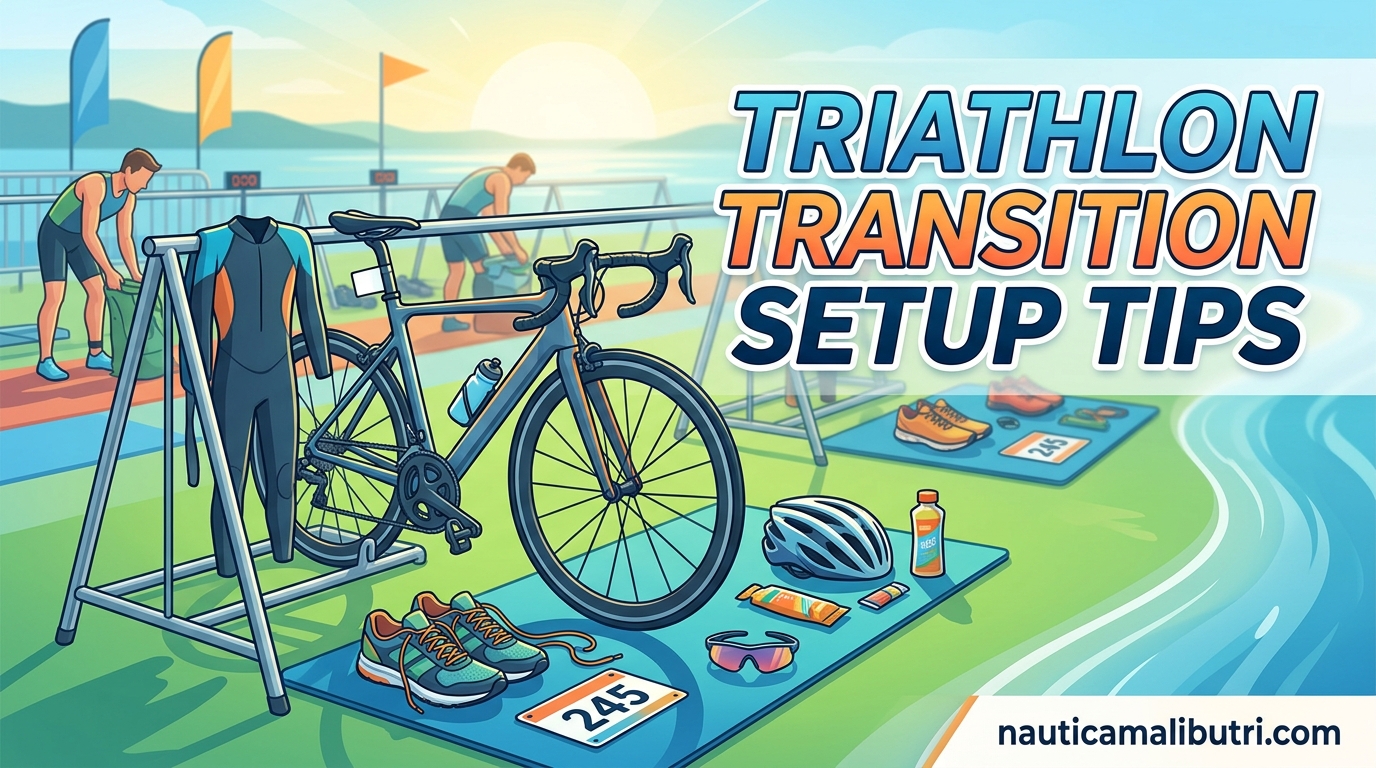
When setting up your gear, place items in order of use. Your bike shoes and helmet should be closest to the bike. Running shoes and race belt go toward the run exit. Keep everything within arm’s reach of your bike. Lay out a small towel to mark your territory and provide a clean surface.
T1 Transition: Swim to Bike Step-by-Step
T1 is typically the longer and more complex transition. You are wet, possibly cold, and dealing with a wetsuit. Here is the step-by-step process that works.
Step 1: Exit the Water and Run to Transition
Swim as far into shore as possible before standing up. Running through shallow water wastes energy. Once on land, run toward the transition entrance. Keep your goggles and swim cap on until you reach your bike. This saves time and prevents losing gear.
Step 2: Find Your Bike Rack
Use your landmarks to locate your rack quickly. Walk the route beforehand so you know exactly which row and position. Do not waste time looking at other bikes. Focus on your landmark and move with purpose.
Step 3: Remove Your Wetsuit
Unzip your wetsuit immediately upon reaching your bike. Pull the top down to your waist while running. Once at your spot, roll the wetsuit down past your hips. Step on the legs and pull each foot out. Practice this motion until it becomes automatic.
Put your wetsuit in the designated area or your gear bag. Never leave it blocking other athletes. Some races have wetsuit strippers near the swim exit. Use them if available; they can save 30-60 seconds.
Step 4: Apply Bike Gear
Put on your helmet first. Buckle it securely. Many races require your helmet to be on and buckled before you touch your bike. Violating this rule means disqualification.
Next, put on your bike shoes. If you are comfortable with a flying mount, leave your shoes clipped to the pedals and put them on while rolling. Otherwise, put them on at your rack. Grab your sunglasses and nutrition if needed.
Step 5: Run to the Mount Line
Run with your bike to the designated mount line. Keep your bike on the correct side. Stay left if that is the rule at your race. Watch for other athletes mounting and dismounting.
Step 6: Mount and Start Pedaling
Cross the mount line before getting on your bike. Swing your leg over smoothly and start pedaling. Get up to speed before trying to put on shoes if doing a flying mount. Focus on clean execution, not speed, in the first 100 meters.
T2 Transition: Bike to Run Step-by-Step
T2 is usually faster than T1 because you are not dealing with a wetsuit. The key is a clean dismount and efficient gear switch.
Step 1: Dismount Before the Line
Slow down as you approach the dismount line. Unclip one foot and swing it over the bike while coasting. Touch down before the line with your foot. Running with your bike starts immediately after the line.
Practice this dismount during training rides. A smooth dismount saves time and prevents crashes. I saw a competitor fall at the dismount line last season because they tried to unclip too late.
Step 2: Run Your Bike to the Rack
Run with your bike by the saddle or handlebars. Find your rack using the same landmarks from T1. Move with purpose but stay controlled.
Step 3: Rack Your Bike and Remove Helmet
Rack your bike by the saddle or handlebars as required. Remove your helmet immediately. You cannot cross the run exit line wearing a helmet. Place it with your other gear.
Step 4: Running Shoes and Race Belt
Put on your running shoes. Elastic laces make this faster; you can slip your feet in without tying. Attach your race belt with your number facing forward. Grab any nutrition or hydration for the run course.
Step 5: Exit to the Run Course
Head toward the run exit. Your legs will feel strange after biking. Start with short, quick steps until your running rhythm returns. This jelly-leg feeling usually fades within the first half mile.
Essential Triathlon Transition Gear Checklist
Bring only what you need. Extra clutter slows you down and increases the chance of forgetting something important.
T1 Essentials: Bike helmet, bike shoes, sunglasses, race nutrition, water bottle, small towel.
T2 Essentials: Running shoes, race belt with number, hat or visor, spare nutrition.
What to Leave at Home: Extra clothes, unnecessary gear, valuables, large bags. Transition areas get crowded. Minimal gear means faster transitions and less stress.
Organize everything in order of use. Place bike gear on the left, run gear on the right if that matches your flow. Practice your setup at home before race day. Lay it out exactly as you will on race morning.
Race-Specific Transition Considerations
Different race distances have different transition setups. Understanding these differences helps you prepare appropriately.
Sprint Triathlon: Usually one transition area. Keep gear minimal. Fast transitions matter more in short races. Practice speed over comfort.
Olympic Distance: Similar setup to sprint but with more time between disciplines. Nutrition becomes more important. Set up extra gels or bars.
70.3 Half Ironman: May have gear bags for T1 and T2. You get a bag for bike gear and another for run gear. Know the bag drop rules and timing.
Iron-Distance: Always uses gear bags. You cannot access your main bike area during T2. Special needs bags may be available on the bike and run courses. Study the athlete guide carefully.
Split Transitions: Point-to-point races may have separate T1 and T2 areas in different locations. Gear goes in bags that transport between locations. Know what gear goes in which bag and what you access at each transition.
Pro Tips for Faster Transitions
After years of racing and coaching beginners, these are the tips that make the biggest difference.
Smooth is Fast: Rushing leads to fumbling. Controlled, practiced movements beat frantic scrambling every time. Practice transitions until they feel automatic.
Practice at Home: Set up a mock transition area in your driveway. Time yourself. Practice wetsuit removal, mounting, and dismounting. Ten minutes of practice twice a week makes a huge difference.
Visualization: Mental rehearsal works. Picture yourself executing perfect transitions. Walk through the race morning routine in your head the night before.
Elastic Laces: Install lock laces or elastic laces in your running shoes. Slip-on entry saves 15-30 seconds in T2. This small upgrade pays off immediately.
Nothing New on Race Day: Use the same gear you trained with. New shoes, new nutrition, or new equipment in transition invites problems. Test everything in training first.
Handling Transition Anxiety and Nerves
Race day nerves hit many beginners hard in the transition area. The crowded space, time pressure, and physical exertion create anxiety. Here is how to handle it.
Arrive early to set up in a calm environment. Walk through your transitions before the race starts. This familiarity reduces anxiety when you are racing.
Breathe deliberately in transition. Take one deep breath as you enter. This simple action centers your mind and slows your heart rate slightly.
Have a plan for when things go wrong. If you cannot find your bike, stop and look for your main landmark. If you drop something, pick it up calmly. Panic wastes more time than the problem itself.
Remember that everyone else is nervous too. Focus on your process, not the chaos around you. Smooth execution beats rushed speed.
Common Transition Mistakes to Avoid
These are the errors I see repeatedly at races, especially from first-timers.
Overpacking: Bringing too much gear creates clutter and confusion. Stick to essentials only.
No Practice: First-time transitions should not happen on race day. Practice at least three times before your event.
Helmet Violations: Unbuckled helmets or mounting before the line cause disqualifications. Know the rules and follow them precisely.
Wrong Bike Racking: Rack by the saddle or stem as directed. Wrong racking creates problems for you and neighboring athletes.
Forgetting Landmarks: Without a visual marker, finding your bike becomes a guessing game. Choose and remember your landmark.
What is the 80/20 rule in triathlon?
The 80/20 rule in triathlon training means spending 80% of your training time at low intensity and 20% at high intensity. This approach builds aerobic fitness while avoiding burnout and injury. It applies to training, not directly to transitions, though smooth transitions help you race more efficiently overall.
How to set up transition in triathlon?
Set up your transition area by arriving early, finding your assigned bike rack, and placing gear in order of use. Put bike helmet and shoes closest to your bike. Lay running shoes and race belt toward the run exit. Use a bright towel to mark your spot. Choose a landmark to find your bike quickly. Keep only essential items; leave valuables and extra gear at home.
What is the 2 2 2 2 method triathlon?
The 2 2 2 2 method refers to a training approach of 2 hours of swimming, 2 hours of biking, 2 hours of running, and 2 hours of strength work per week. It is a minimalist training plan for busy athletes. While not transition-specific, efficient transitions become more important when training time is limited.
What is the 90 second rule in triathlon?
The 90 second rule refers to the transition time goal many age-groupers aim for in T2 (bike to run). While elite athletes transition in 30-45 seconds, a 90-second T2 is realistic and efficient for most beginners and intermediate triathletes. Practice and proper setup make this achievable.
What do I need in my triathlon transition area?
You need bike helmet, bike shoes, sunglasses, race belt with number, running shoes, and any nutrition for the bike and run. For T1, add a small towel for wetsuit removal. For longer races, include spare tubes and tools. Keep gear minimal and organized in order of use.
How can I make my triathlon transition faster?
Practice transitions at home twice weekly. Use elastic laces in running shoes. Keep gear minimal and organized. Visualize your transitions before race day. Do a pre-race walk-through to memorize your bike location. Remember that smooth movements beat rushed fumbling every time.
Conclusion: Master Your Triathlon Transition Setup
Smooth transitions separate confident triathletes from stressed beginners. The triathlon transition setup tips in this guide give you a framework for T1 and T2 success. Remember that preparation beats talent when it comes to transitions.
Practice your setup before race day. Walk through the transition area. Visualize your movements. Choose your landmarks. Keep your gear minimal and organized.
Your first triathlon transition may not be perfect, and that is okay. Every race teaches you something new. Focus on smooth execution, stay calm, and enjoy the experience. See you at the finish line.