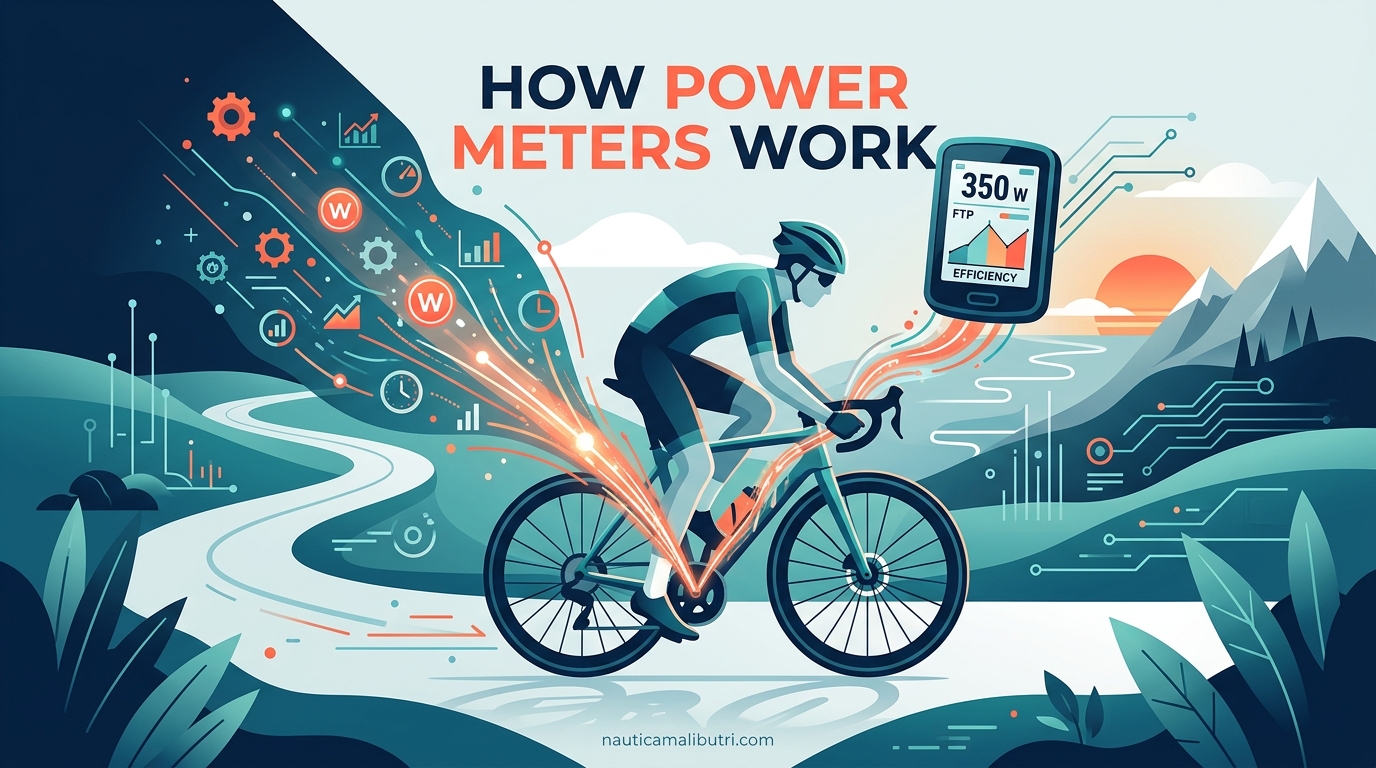
If you have ever wondered how power meters work, you are not alone. I spent my first year as a triathlete glancing at the mysterious watt numbers on my training partner’s bike computer, completely baffled by what they actually meant. A power meter is essentially a device that measures the force you apply to the pedals and how fast you spin them, then calculates your power output in watts. The magic formula is simple: Power = Torque x Cadence. Understanding this technology transformed my training from guesswork into precision, and by the end of this guide, you will understand exactly how these remarkable devices turn your pedaling motion into actionable data.
Power meters have become essential tools for cyclists and triathletes who want to train smarter, not just harder. Unlike heart rate monitors that lag behind your effort by 30-60 seconds, power meters give you immediate, objective feedback on exactly how much work you are doing in that moment. In this comprehensive guide, we will break down the science behind how power meters work, explore the different types available, and explain why this technology has become the gold standard for endurance training.
Table of Contents
How Power Meters Work
How power meters work is actually a straightforward process once you understand the underlying principles. At their core, power meters measure two things: how hard you are pushing (torque) and how fast you are spinning (cadence). When you multiply these two values together, you get power measured in watts.
The measurement process happens in three distinct steps. First, strain gauges inside the power meter detect the bending or deflection that occurs when you push down on the pedals. Second, sensors measure your cadence by tracking how quickly the cranks are rotating. Third, an onboard processor calculates power using the formula Power = Torque x Angular Velocity, then transmits this data wirelessly to your head unit or smartphone.
What makes this technology remarkable is its precision. Modern power meters can detect minute changes in force and calculate your power output to within 1-2% accuracy. This means when your display shows 250 watts, you can trust that number represents your actual physiological output, regardless of wind, hills, or fatigue.
Understanding Strain Gauges
Strain gauges are the heart of every power meter. These tiny sensors are essentially metal foil patterns etched onto a flexible backing material. When you push on the pedals, the crank arm, pedal spindle, or spider bends ever so slightly under the load. This bending causes the strain gauge to deform, which changes its electrical resistance in a predictable way.
The electrical principle behind strain gauges is called the piezoresistive effect. When the metal foil pattern stretches or compresses, the electrons flowing through it encounter more or less resistance. Power meters use a Wheatstone bridge circuit to measure these tiny resistance changes with incredible precision. A typical strain gauge might change resistance by only 0.1% under normal pedaling forces, but the electronics can detect this minuscule variation.
Temperature changes can affect strain gauge readings, which is why quality power meters include temperature compensation algorithms. When you calibrate your power meter, you are essentially telling it what “zero” looks like at the current temperature. Some advanced units like those from Quarq feature automatic temperature compensation that adjusts readings in real-time as conditions change.
Types of Power Meters
Power meters come in several configurations depending on where they are mounted on your bike. Each type has distinct advantages and trade-offs in terms of cost, accuracy, ease of installation, and compatibility.
Crank-Based Power Meters
Crank-based power meters mount directly to your crank arm, either on the left side only or on both sides. Left-side-only models measure the force on your left crank arm and double the value to estimate total power. Dual-sided crank meters measure both sides independently for true left/right balance data.
These meters are popular because they are relatively affordable and easy to install. Brands like Stages and 4iiii dominate this category with lightweight, reliable options. The downside is that you are limited to specific crank models, and switching between bikes requires swapping the entire crankset.
Spider-Based Power Meters
Spider-based power meters mount at the center of your crankset where the chainrings attach. They measure total power at the point where force transfers from both legs to the drivetrain. This location provides excellent stability and consistent readings.
Quarq and SRAM Power meters use this design, offering robust construction and high accuracy. Spider-based meters capture power from both legs simultaneously but cannot distinguish left from right power. They require specific crankset compatibility but are generally more durable than crank-arm options.
Pedal-Based Power Meters
Pedal-based power meters like Garmin Vector and Favero Assioma install directly into your pedals. They measure force at the exact point where your foot applies power to the bike. This design offers the easiest installation and the simplest bike-to-bike transfer.
Most pedal systems are dual-sided by default, providing true left/right balance data. They can also analyze pedaling dynamics like where in the pedal stroke you apply the most force. The trade-off is that pedals are exposed to more impacts and weather than other locations, potentially affecting longevity.
Hub-Based Power Meters
Hub-based power meters like the PowerTap G3 live inside your rear wheel hub. They measure power after it passes through the drivetrain, capturing the final output that actually propels you forward. This location provides consistent readings and is protected from the elements.
The main limitation is that you are tied to that specific wheel. If you swap training wheels for race wheels, you lose your power meter. Hub-based meters also cannot provide left/right balance data since both legs contribute to the single output measurement.
Bottom Bracket-Based Power Meters
Bottom bracket power meters like the ROTOR INpower install inside your frame’s bottom bracket shell. They measure torque at the center of the drivetrain. These systems are protected from impacts and weather but require specific frame compatibility.
Installation can be complex depending on your frame, and like spider-based meters, they measure total power without left/right differentiation. They do offer very stable readings and excellent protection from the elements.
| Type | Location | Left/Right Balance | Best For |
|---|---|---|---|
| Crank-Based | Crank arm | Single or dual | Budget-conscious riders |
| Spider-Based | Chainring spider | Total power only | Durability seekers |
| Pedal-Based | Pedal spindle | Yes (dual-sided) | Multiple bike owners |
| Hub-Based | Rear hub | Total power only | Single-wheel users |
| Bottom Bracket | Frame bottom bracket | Total power only | Weather protection priority |
How Power is Calculated
The calculation of cycling power follows a fundamental physics equation. Power equals torque multiplied by angular velocity. In cycling terms, that translates to the force you apply to the pedals multiplied by how fast you are spinning them.
Let us break this down with a real example. If you are pushing with 20 Newton-meters of torque at a cadence of 90 RPM, your power output would be approximately 188 watts. Increase your cadence to 100 RPM while maintaining the same torque, and your power jumps to about 209 watts. This is why professional cyclists often spin at higher cadences to generate more power with less muscular fatigue.
Power meters use either event-based or time-based measurement to capture this data. Event-based measurement records power at specific pedal positions, typically multiple times per revolution. Time-based measurement samples at fixed intervals regardless of pedal position. Most modern meters use event-based sampling for more accurate power calculation throughout the pedal stroke.
The raw torque and cadence data gets processed through calibration curves specific to each power meter. These curves account for the unique characteristics of the strain gauges and mechanical components. When you perform a zero offset calibration, you are essentially establishing the baseline reading when no force is applied.
Connectivity: ANT+ vs Bluetooth
Once your power meter calculates your wattage, it needs to transmit that data to your head unit, smartphone, or GPS watch. This happens wirelessly using either ANT+ or Bluetooth Smart protocols, or both.
ANT+ is a wireless protocol specifically designed for fitness devices. It creates a one-way broadcast from your power meter to any receiving device within range. ANT+ transmits power data approximately 4 times per second, which is sufficient for most training applications. The advantage of ANT+ is its reliability and low power consumption.
Bluetooth Smart (also called Bluetooth Low Energy or BLE) offers more flexibility. It can transmit data up to 64 times per second, providing smoother data for analysis. Bluetooth also enables two-way communication, allowing your smartphone or computer to update firmware on the power meter. Most modern power meters support both protocols.
When choosing a head unit or app, ANT+ compatibility is essential if you plan to use multiple sensors simultaneously. Bluetooth connections work well for phone-based training apps like Zwift or TrainerRoad. Many serious triathletes use dual-mode setups, connecting to a Garmin head unit via ANT+ while simultaneously broadcasting to a smartphone app via Bluetooth.
Calibration and Accuracy
Even the best power meters need occasional calibration to maintain accuracy. Calibration ensures that when you are not applying force, the meter reads zero, and that the relationship between force and the reported watts remains correct.
The zero offset procedure is simple but important. With your crank in a specific position (usually vertical) and no weight on the pedals, you initiate a calibration through your head unit. The power meter records the current strain gauge reading as “zero” and subtracts this value from all future measurements. Temperature changes can drift this zero point, which is why many units require recalibration when moving between significantly different temperatures.
Slope calibration is less frequent but equally important. This process establishes the relationship between the measured deflection and the actual torque being applied. Most manufacturers handle this at the factory, but some high-end meters allow user slope calibration using known weights.
Quality power meters typically claim accuracy within plus or minus 1-2%. This means a reading of 250 watts could represent an actual output between 245 and 255 watts. For training purposes, this level of precision is more than adequate. The key is consistency from day to day, not absolute accuracy compared to other meters.
Why Use a Power Meter
Understanding how power meters work is only half the equation. The real question is why you should use one. After training with power for three seasons, I can say definitively that it transformed my approach to cycling and triathlon.
Power meters provide objective, real-time feedback on your effort. Unlike heart rate, which responds slowly to changes in intensity and can be affected by caffeine, sleep, stress, and temperature, power shows exactly what you are producing in that moment. If you need to hold 250 watts for a 20-minute climb, your power meter tells you immediately if you are on target.
This immediacy makes power meters invaluable for pacing. In a triathlon, starting the bike leg too hard can destroy your run. With a power meter, you can cap your effort at your Functional Threshold Power (FTP) and ensure you have legs left for the final discipline.
Power data also enables structured training. By establishing your FTP and training zones based on percentages of that number, you can target specific physiological adaptations. Easy rides stay easy, hard intervals hit the exact intensity needed, and you can track fitness improvements over time with concrete numbers.
Is a power meter worth it for beginners? If you are serious about improving, absolutely. While you can certainly get faster without one, a power meter removes the guesswork and accelerates your learning curve. You will understand your true capabilities, avoid overtraining, and see progress measured in watts gained rather than perceived effort.
Limitations and Considerations
Power meters are remarkable tools, but they are not without limitations. Understanding these constraints helps you use your data more effectively.
Single-sided power meters that double your left leg power assume perfect 50/50 balance between legs. In reality, most cyclists have some imbalance, often favoring their dominant leg by 2-5%. This means your reported power might be slightly higher or lower than actual total output. For training consistency, this does not matter, but comparing your numbers to others requires caution.
Data transmission rates create a subtle limitation. Even Bluetooth at 64 samples per second provides a smoothed representation of your pedal stroke, not instantaneous force application. This is fine for training but means power meters cannot capture micro-variations in force.
Power meters measure mechanical output, not physiological cost. Two riders producing 250 watts might be working at very different intensities relative to their fitness. This is why combining power with heart rate data provides the complete training picture.
Environmental factors like temperature, humidity, and drivetrain condition can affect readings slightly. A poorly maintained chain can cost you 5-10 watts through friction that the power meter cannot distinguish from your actual output.
Frequently Asked Questions
How does the power meter work?
A power meter works by measuring the force you apply to the pedals (torque) and how fast you spin them (cadence), then calculates power in watts using the formula Power = Torque x Cadence. Strain gauges inside the meter detect tiny deflections when you pedal, changing electrical resistance that gets converted into torque measurements.
Is a power meter worth it for beginners?
Yes, a power meter is worth it for beginners who are serious about improving their cycling. While you can train without one, a power meter removes guesswork by providing objective, real-time feedback on your effort. This helps beginners avoid common mistakes like riding too hard on easy days and not hard enough on hard days, accelerating fitness gains and preventing overtraining.
Is 300 watts for 20 minutes good?
Whether 300 watts for 20 minutes is good depends on your body weight and fitness level. For a 70kg cyclist, 300 watts for 20 minutes represents approximately 4.3 watts per kilogram, which is competitive amateur to Category 3 racer level. For a 90kg cyclist, it is about 3.3 w/kg, which is solid recreational fitness. Elite cyclists might hold 350-400+ watts for 20 minutes.
What is the difference between single and dual-sided power meters?
Single-sided power meters measure force on one crank arm (usually the left) and double that value to estimate total power. Dual-sided meters measure both legs independently and provide true total power plus left/right balance data. Single-sided meters cost less but assume perfect 50/50 leg balance. Dual-sided meters cost more but reveal imbalances and provide more accurate total power readings.
How accurate are cycling power meters?
Quality cycling power meters are typically accurate within plus or minus 1-2%. This means a reading of 250 watts could represent actual output between 245-255 watts. Consistency from day to day is more important than absolute accuracy. Regular calibration (zero offset) helps maintain this accuracy, especially when temperature changes significantly.
What should I do after getting a power meter?
After getting a power meter, your first step should be performing an FTP test to establish your baseline fitness. This gives you training zones based on percentages of your Functional Threshold Power. Then start using the meter for all rides, paying attention to how different efforts feel at specific wattages. Record your data and watch for trends over weeks and months rather than worrying about daily variations.
Conclusion
Understanding how power meters work gives you a deeper appreciation for the technology that has revolutionized cycling and triathlon training. These devices use sophisticated strain gauge technology to measure the force you apply to your pedals, combine it with your cadence, and calculate your power output in real-time. The fundamental equation remains elegant in its simplicity: Power = Torque x Cadence.
Whether you choose a crank-based, pedal-based, spider-based, or hub-based power meter, the underlying principles are the same. Strain gauges detect deflection, electronics calculate torque, sensors measure rotation speed, and wireless protocols transmit the data to your devices. With regular calibration, these tools provide consistent, objective feedback that transforms training from guesswork into science.
If you are considering your first power meter, start by thinking about where you want to mount it and what features matter most to you. Then take the plunge. Once you begin training with power, you will wonder how you ever rode without knowing exactly how hard you were working. The numbers do not lie, and that is exactly why they are so valuable.