Learning how to swim freestyle for beginners opens the door to one of the most rewarding fitness activities you can pursue. Whether you are training for your first triathlon or simply want to improve your cardiovascular health, mastering the freestyle stroke gives you an efficient way to move through the water with confidence.
I have taught hundreds of adult beginners to swim over the years, and I can tell you that freestyle is absolutely learnable at any age. Most of my students can swim 25 meters continuously within 4 to 6 weeks of consistent practice. The key is breaking the stroke into manageable components and building each skill progressively.
This guide covers everything you need to know about freestyle swimming technique. We will walk through body position, breathing, arm mechanics, and kicking. You will learn the specific drills that accelerate progress and discover how to avoid the mistakes that slow most beginners down. By the end, you will have a clear 4-week plan to take you from your first stroke to swimming multiple laps with ease.
Table of Contents
How to Swim Freestyle for Beginners: Body Position Foundation
Your body position in freestyle determines how much effort you need to move forward. Poor alignment creates drag that makes swimming feel exhausting. Good positioning lets you glide through the water efficiently.
Streamline Position
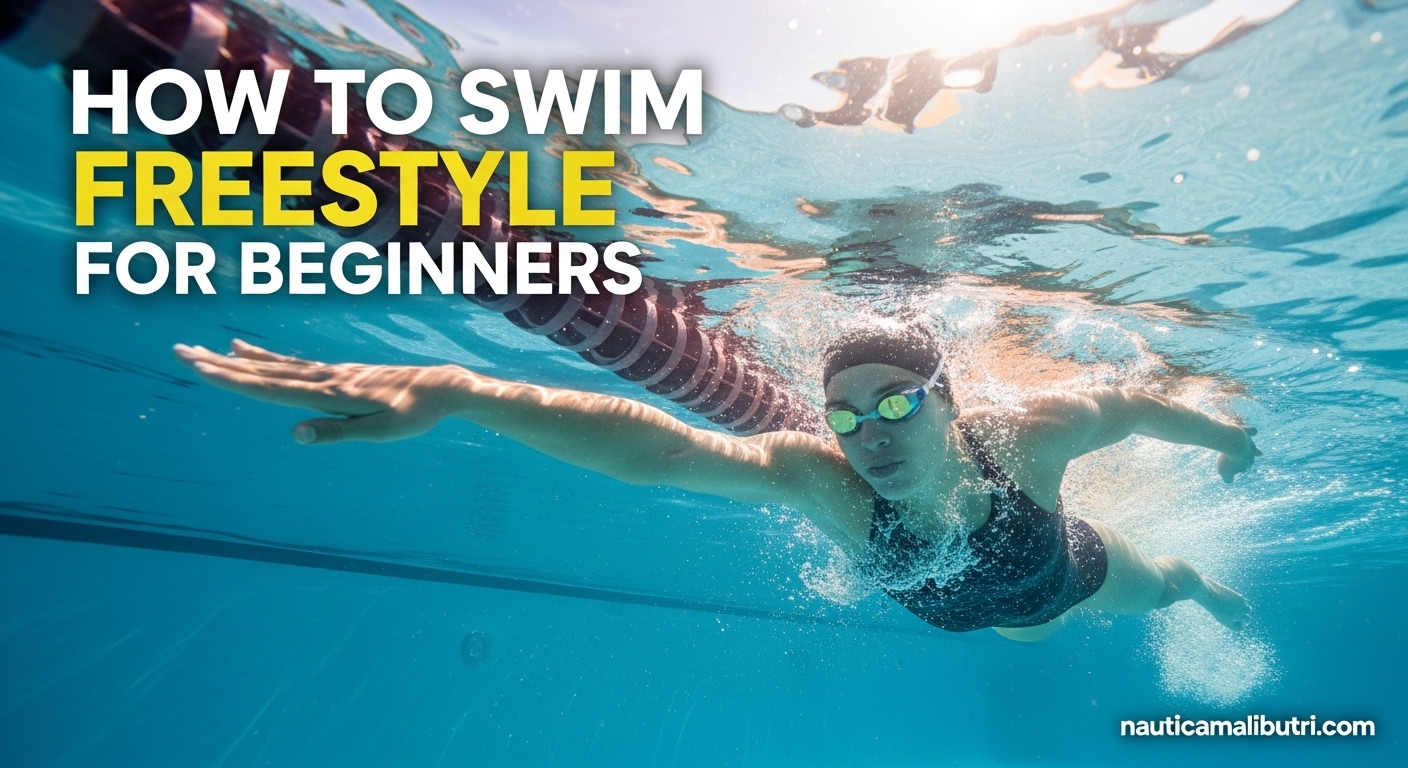
The foundation of freestyle swimming is the streamlined horizontal position. Imagine your body as a long, straight line floating on the surface. Your hips should sit high in the water, near the surface, not sagging toward the bottom.
Beginners often struggle with sinking hips. This usually happens when you lift your head too high or fail to engage your core. Practice the superman glide to feel proper alignment. Push off the wall with arms extended and hold that straight body line as long as possible.
Maintaining a streamlined position reduces drag by up to 30 percent compared to swimming with dropped hips. This efficiency matters even more for triathlon swimming, where you need to conserve energy for the bike and run legs ahead.
Head Position
Your head acts as a rudder for your entire body. The correct position keeps your eyes looking straight down at the pool floor, not forward. The waterline should hit your head at about hairline level.
When you look forward, your hips and legs drop immediately. This creates a vertical wall of water resistance that makes each stroke feel harder than it should. Looking down keeps your body horizontal and your hips high.
Practice this during your warm-up. Push off the wall and focus on feeling the water at your hairline. Notice how much easier it is to maintain your forward momentum when your head stays in this neutral position.
Freestyle Breathing Technique
Breathing is the skill that challenges most beginners. The good news is that with the right approach, you can develop a relaxed, rhythmic breathing pattern that feels natural.
Side Breathing Mechanics
Freestyle breathing happens to the side, not by lifting your face forward. As one arm enters the water and extends, your head rotates with your body to the same side. Your mouth clears the water just enough for a quick inhale.
The most important breathing cue is to exhale continuously while your face is in the water. Do not hold your breath underwater. Begin blowing bubbles gently through your nose the moment your face returns to the neutral position after a breath.
Many beginners wait until they turn to breathe before exhaling. This causes a panicky rush to get air in and out in the brief moment your mouth is clear. Continuous underwater exhalation gives you a relaxed, unhurried inhale when you turn.
Breathing Patterns
Bilateral breathing means breathing to both sides, alternating every three strokes. This pattern keeps your stroke balanced and prevents the shoulder strain that comes from always breathing to one side.
However, as a beginner, start with breathing every two strokes to one side. This gives you more frequent air breaks while you build endurance. Once you can swim 100 meters comfortably, begin practicing bilateral breathing every third stroke.
For triathlon swimming, bilateral breathing becomes essential in open water. Waves or bright sunlight on one side may force you to breathe to the other. Training both sides from early on prepares you for these conditions.
Arm Stroke and Pull Pattern
Your arms provide the propulsion that moves you forward. Understanding the phases of the arm stroke helps you maximize the distance you travel with each pull.
Hand Entry and Catch
Your hand enters the water fingertips first, about 18 inches in front of your shoulder, not crossing your centerline. The arm extends forward underwater into what swimmers call the catch position.
The catch is where your hand and forearm begin to anchor in the water to pull yourself forward. Think of it as reaching over a barrel. You want a high elbow with your fingertips pointing down. This position is called early vertical forearm or EVF.
Many beginners drop their elbow during the catch, which lets water slip past their hand instead of anchoring for a strong pull. Focus on keeping your elbow higher than your hand throughout the underwater phase.
The Pull
From the catch position, accelerate your hand through the water in an S-curve pattern. Your hand moves slightly outward, then inward under your body, then outward again toward your hip.
Think of pulling yourself over the anchored hand rather than pushing water backward. The acceleration matters here. Your hand should move fastest at the end of the stroke near your hip, not at a constant speed throughout.
A strong finish at your hip adds noticeable propulsion. Many beginners shorten their stroke and pull their hand out too early, leaving power on the table. Push all the way back until your thumb brushes your thigh.
Recovery
The recovery phase brings your arm forward above or through the water to set up the next stroke. Use a high elbow recovery, bending your elbow so your hand passes close to your body rather than swinging wide.
A wide, straight-arm recovery wastes energy and creates imbalance. The high elbow position keeps your arm relaxed and ready for the next entry. Imagine leading the recovery with your elbow, not your hand.
Flutter Kick Fundamentals
Your kick in freestyle serves two purposes. It provides some propulsion, but more importantly it keeps your hips and legs near the surface to maintain good body position.
Kick Mechanics
The flutter kick originates from your hips, not your knees. Your legs stay relatively straight with a slight knee bend. The motion is small and quick, like a flutter, not large scissor kicks.
Point your toes behind you, keeping your ankles flexible. Tight ankles with toes pointing down create drag. Think of your foot as a flipper that extends your leg line.
The most common kicking error among beginners is bending the knees too much. This creates a bicycle-kicking motion that drives your legs downward and disrupts your body position. Keep the kick compact with most of the motion coming from the hip joint.
Kick Timing
Triathlon swimmers often use a 2-beat kick, meaning two kicks per stroke cycle. This conserves leg energy for the bike and run while maintaining adequate body position.
Beginners often benefit from a 4-beat or 6-beat kick initially. The faster kick tempo provides more lift to help keep your legs high while you develop better overall balance in the water. As your technique improves, you can reduce kick frequency.
Body Rotation and Timing
Rotation around your long axis is what connects all the pieces of freestyle together. Proper rotation makes breathing easier, extends your reach, and engages your core muscles.
Your body should rotate as a unit from your hips through your shoulders. As one arm enters the water and extends forward, that same-side hip and shoulder rotate slightly downward. This allows your recovering arm to clear the water without lifting it high.
The timing of the stroke follows a pattern: one arm enters and extends as the other finishes its pull. Your kick maintains a steady rhythm throughout. Your breathing happens during the rotation as your arm enters the water.
Many beginners swim flat without rotation. This forces them to lift their head to breathe and reach across their centerline. Adding rotation immediately improves these issues and makes swimming feel easier.
Common Beginner Mistakes and Fixes
Every beginner makes mistakes. Recognizing and correcting them early prevents bad habits from becoming permanent. Here are the most common issues and their solutions.
| Mistake | Why It Happens | The Fix |
|---|---|---|
| Legs sinking | Head too high, poor kick, tense body | Look down, kick from hips, relax into the water |
| Lifting head to breathe | Not rotating enough, holding breath underwater | Rotate body more, practice side kicking, exhale continuously |
| Crossing centerline on entry | Overreaching, flat body position | Enter wider, focus on shoulder-width hand placement, add rotation |
| Overkicking from knees | Trying to generate too much propulsion from legs | Kick smaller from hips, practice kickboard kick |
| Holding breath underwater | Fear of not getting enough air | Blow bubbles continuously, practice bobbing, breathe every stroke initially |
| Straight arm recovery | Lack of body rotation, tense shoulders | Rotate more, practice fingertip drag drill, relax arm muscles |
| Dropping elbow in catch | Poor feel for the water, rushing the stroke | Sculling drills, catch-up drill, slow down the stroke |
| Shortening stroke | Fatigue, trying to swim faster | Focus on distance per stroke, finish at thigh, reduce stroke rate |
Freestyle Drills for Beginners
Drills isolate specific components of the stroke so you can focus on one skill at a time. Practice these in order, spending time on each before moving to the next.
Body Position Drills
Superman Glide: Push off the wall with arms extended and hold the streamlined position. Kick gently or not at all. Feel your hips near the surface. Practice this until you can glide 10 meters easily.
Dead Frog Float: Float on your stomach with arms at your sides and legs relaxed in a bent position. Feel how your body naturally finds balance. This reduces the fear of sinking many beginners experience.
Streamline Kick: Hold the wall with both hands, push off into a tight streamline, and kick across the pool. Focus on keeping your hands, head, hips, and feet in one straight line.
Breathing Drills
Side Kicking: Hold one arm extended forward, the other at your side. Kick on that side with your face in the water. Rotate to breathe toward the extended arm, then return to face-down. This isolates the breathing rotation.
Bobbing: Stand in shallow water and practice exhaling underwater through your nose, then turning for a quick breath. Repeat until it feels automatic. This builds breathing rhythm without stroke complexity.
Single Arm Freestyle: Swim with one arm while the other stays at your side. This drill exaggerates rotation and gives you space to practice breathing without worrying about arm timing.
Arm Technique Drills
Catch-Up Drill: Leave one arm extended forward until the other arm catches up and touches it. This forces a long, patient stroke and builds the habit of finishing one arm pull before starting the next.
Fingertip Drag: Drag your fingertips along the water surface during recovery. This ensures a high elbow close to your body and prevents wide swinging arms.
Sculling: Practice the catch position with small figure-eight hand movements. This develops your feel for anchoring in the water and improves your catch mechanics.
4-Week Beginner Training Plan
This progressive plan takes you from your first pool session to swimming continuous freestyle laps. Follow it three times per week for best results.
Week 1: Building Comfort
Focus on water confidence and basic body position. Each session should be 30 minutes.
Warm up with 5 minutes of superman glides and dead frog floating. Practice streamline kicking for 4 x 25 meters with rest between. Work on side kicking with breathing for 4 x 25 meters. Cool down with easy floating.
Week 2: Adding Breathing
Integrate breathing into the stroke pattern. Sessions extend to 35 minutes.
Begin with 5 minutes of bobbing and side kicking review. Swim single arm freestyle for 4 x 25 meters, focusing on breathing timing. Attempt 4 x 25 meters of full freestyle with breathing every two strokes. Rest as needed between lengths. Finish with catch-up drill practice.
Week 3: Stroke Development
Build endurance and refine technique. Sessions are now 40 minutes.
Start with 200 meters of mixed drills: superman glide, side kick, catch-up. Swim 4 x 50 meters freestyle focusing on one technique point per length. Practice fingertip drag drill for 4 x 25 meters. Attempt your first continuous 100-meter freestyle swim, resting at the wall if needed.
Week 4: Building Endurance
Consolidate skills and extend distance. Sessions reach 45 minutes.
Warm up with 200 meters easy swimming mixing drills and freestyle. Swim 4 x 100 meters freestyle with 30 seconds rest between. Focus on relaxed breathing and consistent stroke rhythm. Practice bilateral breathing on some lengths. Cool down with 100 meters easy backstroke or floating.
By the end of week four, you should be able to swim 100 meters continuously with reasonable technique. Continue building from here by adding 50 meters to your longest swim each week.
Freestyle for Triathlon Swimming
Triathlon swimming differs from pool swimming in important ways. Preparing for these differences during your pool training makes race day smoother.
Open Water Adaptations
In open water, you cannot see the bottom and may not have lane lines to follow. Practice swimming with your eyes closed for a few strokes in the pool to simulate this. Get comfortable with the feeling of swimming straight without visual reference.
Sighting means lifting your eyes briefly to look forward without lifting your whole head. This causes a slight hip drop, so practice minimizing the motion. Look forward just enough to see the buoy, then return to neutral head position immediately.
Bilateral breathing becomes essential in open water. Waves, sun glare, or other swimmers may make one side unusable. Practice breathing to your weaker side in the pool so you are ready for any conditions.
Wetsuit Considerations
Most triathlons allow wetsuits in cooler water. Wetsuits add buoyancy that helps keep your hips and legs high, which can actually improve your body position. However, the added buoyancy changes your stroke mechanics slightly.
Practice swimming in your wetsuit before race day if possible. The tightness across the chest affects breathing, and the buoyancy changes your rotation. Even 30 minutes of wetsuit practice helps you adapt.
Energy Conservation
In triathlon, the swim is just the beginning. You need to exit the water with enough energy for a strong bike and run.
Focus on a 2-beat kick to save your legs. Drafting behind other swimmers reduces your energy expenditure by 10 to 20 percent. Position yourself at the sides or feet of faster swimmers when possible.
Start the swim conservatively. Many beginners sprint the first 100 meters in race excitement, then struggle through the rest. Begin at a pace you can maintain, then build speed if you feel good after the first quarter of the distance.
Frequently Asked Questions
How do I teach myself freestyle swimming?
Start with water comfort drills like floating and gliding. Progress to kicking with a board, then add arm movements while holding your breath. Finally, integrate side breathing once the stroke mechanics feel automatic. Practice 3 times per week consistently.
How long does it take to learn freestyle swimming?
Most adult beginners can swim 25 meters continuously within 4 to 6 weeks of consistent practice. Swimming 100 meters without stopping typically takes 8 to 12 weeks. Individual progress varies based on comfort in water, fitness level, and practice frequency.
What is the 80 20 rule in swimming?
The 80 20 rule states that 80 percent of your swimming should be at an easy, conversational pace, while 20 percent should be hard effort. This approach builds aerobic endurance without excessive fatigue, making it ideal for triathlon training where you need energy for the bike and run.
Is swimming good for lung capacity?
Yes, swimming significantly improves lung capacity and respiratory muscle strength. The controlled breathing required in freestyle trains your body to use oxygen more efficiently. Studies show swimmers develop greater lung function compared to other athletes.
Does swimming lower blood pressure?
Regular swimming reduces blood pressure by 5 to 10 mmHg in most adults. The combination of aerobic exercise and the hydrostatic pressure of water improves circulation. Swimming 30 minutes three times per week provides measurable cardiovascular benefits.
Start Your Freestyle Journey Today
Learning how to swim freestyle for beginners is one of the most rewarding skills you can develop. The stroke opens doors to triathlon participation, open water adventures, and a lifetime of low-impact fitness.
Remember that consistency matters more than intensity. Three 30-minute sessions per week will take you further than one exhausting hour-long swim. Focus on technique before speed. A smooth, efficient stroke at a moderate pace beats a rushed, splashing effort every time.
Start with the drills in this guide. Work through the 4-week plan. When you hit challenges, return to the fundamentals. Nearly every freestyle problem traces back to body position, breathing, or stroke timing. Master these basics and the rest follows naturally.
Your first triathlon swim leg awaits. The water is ready when you are.