Feeling out of breath after just one lap of freestyle is one of the most frustrating experiences for new swimmers. I have been there myself, gasping at the wall after 25 yards while watching experienced swimmers glide effortlessly past me. Here is the truth that took me months to learn: the problem is rarely fitness. It is technique.
When I finally figured out how to breathe while swimming freestyle properly, everything changed. I went from struggling to complete 100 yards to swimming continuous miles without stopping. The secret is not about holding your breath longer or trying harder. It is about working with the physics of water, not against it.
In this guide, I will walk you through the exact breathing techniques that transformed my swimming. You will learn why most beginners run out of air, how to exhale properly underwater, the correct head position that keeps your hips from sinking, and drills that build these skills progressively. Whether you are an adult learning to swim or a triathlete looking to improve your open water technique, this guide covers everything you need to know.
Table of Contents
Why Breathing Technique Makes or Breaks Your Freestyle
Your body needs oxygen to function, and swimming requires more of it than most land-based activities. But here is what most swimmers miss: the real problem is not getting oxygen in. It is getting carbon dioxide out.
When you hold your breath underwater, CO2 builds up in your bloodstream. That burning sensation in your lungs? That is not lack of oxygen. It is your body screaming to exhale the CO2 that has accumulated. This is why swimmers who hold their breath feel panicked and out of breath even when they are physically fit.
Proper breathing technique also directly affects your body position in the water. When you lift your head to breathe instead of rotating it, your hips drop. This creates drag, making every stroke harder. Your legs sink, your stroke falls apart, and you waste energy fighting water resistance instead of moving forward efficiently.
Buoyancy plays a role too. Your lungs are like flotation devices when filled with air. Managing that air properly helps maintain proper hip position near the surface. The swimmers who make freestyle look effortless have learned to exchange air continuously without disrupting their streamline position.
How to Breathe While Swimming Freestyle: The 3 Core Principles
After coaching hundreds of adult swimmers and going through my own learning curve, I have identified three principles that make the biggest difference. Get these right, and everything else falls into place.
Principle 1: Exhale Continuously Underwater
This is the single most important technique change you can make. Most beginners hold their breath while their face is in the water, then try to exhale and inhale in the brief moment their mouth clears the surface. There is not enough time for both.
Instead, you should start exhaling the moment your face enters the water after a breath. Exhale slowly and continuously through your nose and mouth while swimming. By the time you need to take your next breath, your lungs should be nearly empty. This leaves time for only one thing at the surface: a quick inhale.
Principle 2: Rotate Your Head, Don’t Lift It
Your head should stay in a neutral position, aligned with your spine, throughout the stroke. When it is time to breathe, rotate your head with your body as it naturally turns during the stroke. Do not lift your head forward or up.
Think about keeping one goggle in the water when you breathe. Your mouth should barely clear the surface, taking advantage of the small pocket of turbulent air right at the water line. This low breath keeps your hips up and reduces drag significantly.
Principle 3: Time Your Breath with Your Stroke
Breathing happens during a specific window in your stroke cycle. As your pulling arm completes its underwater pull and begins to recover, your body naturally rotates to that side. This is your breathing opportunity.
Do not pause your stroke to breathe. The breath should happen within the natural rhythm of your swimming. Your arm keeps moving, your body keeps rotating, and your head returns to the neutral position before your recovering arm enters the water.
Exhale Underwater: The Secret to Never Running Out of Air
I remember the exact moment this clicked for me. I was struggling through a 200-yard swim, stopping every 50 yards to catch my breath. A coach watched me and said one sentence that changed everything: “You are holding your breath underwater.”
She was right. I was taking a breath, putting my face back in the water, and holding that air until I turned to breathe again. By then, my lungs were full of CO2 and my body was in panic mode. The solution was simple but counterintuitive: blow bubbles.
How to Exhale Properly
Start exhaling immediately after you take a breath. Let the air out slowly and steadily through both your nose and mouth. Some swimmers prefer emphasizing the nose to prevent water from going up it, but use whatever feels natural.
The exhale should be complete by the time you are ready for your next breath. Think of it as a slow sigh that lasts your entire stroke count between breaths. When you turn to breathe, your lungs should be mostly empty, allowing for a quick, full inhale.
Nose vs. Mouth: Which Is Better?
Most experienced swimmers use a combination of nose and mouth exhalation. The nose helps prevent water from entering your nasal passages, which is especially useful in open water or choppy pool conditions. The mouth allows for a more forceful exhale when needed.
Try this pattern: gentle bubbles through your nose for most of the stroke, then a stronger final push through your mouth right before turning to breathe. This clears your lungs completely and prepares you for a quick, efficient inhale.
Head Position: Rotate, Don’t Lift
Here is a test I give every swimmer I coach. Swim freestyle normally, then tell me what you see when you breathe. If the answer is “the ceiling” or “the wall ahead,” your head position is costing you speed and energy.
When you lift your head forward or upward to breathe, your hips immediately sink. This happens because your body acts like a seesaw around your center of buoyancy. Raising your head lowers your legs. Suddenly, you are dragging your lower body through the water instead of skimming across the surface.
The Proper Head Rotation Technique
Keep your head aligned with your spine in a neutral position. Your eyes should look down and slightly forward, not at the pool wall ahead. When it is time to breathe, let your head roll with your body rotation.
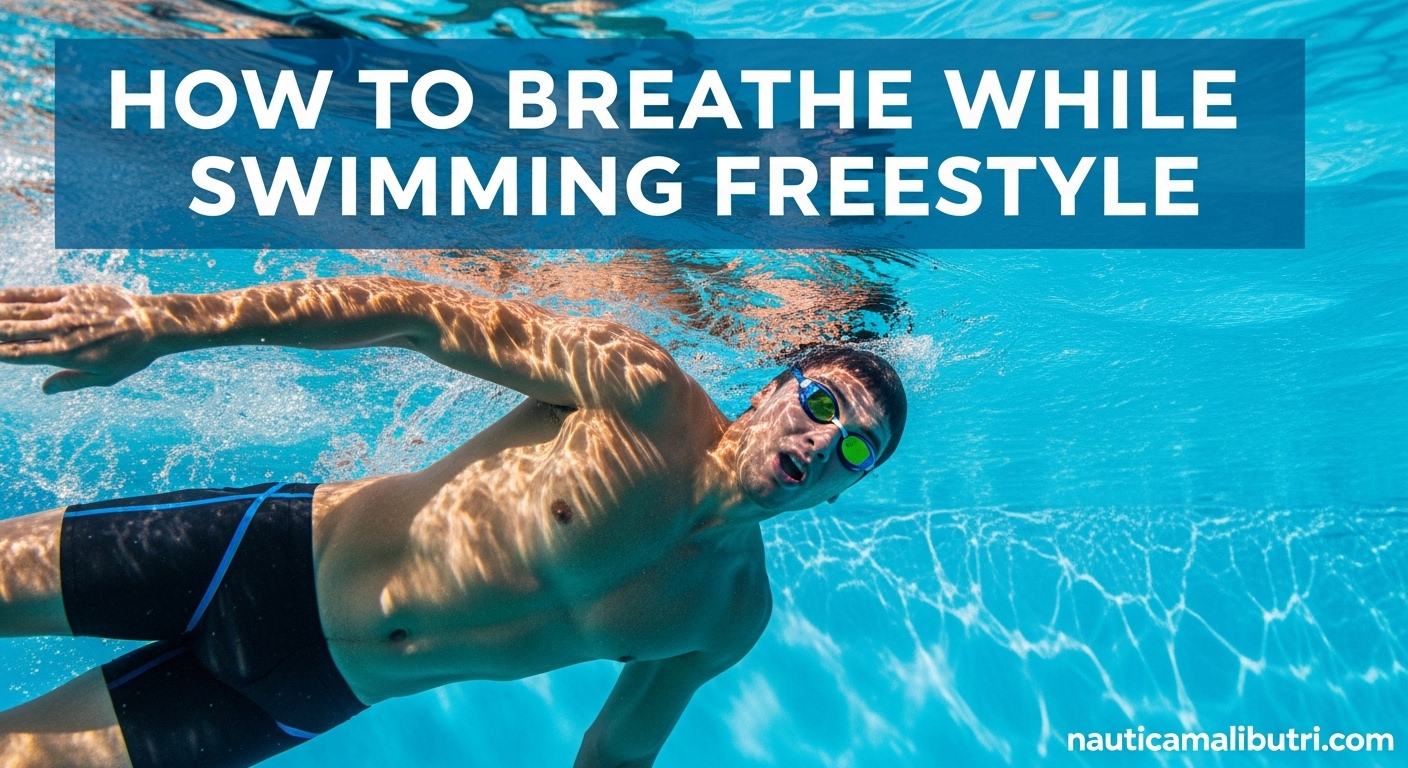
Think of your head resting on a pillow, rolling to the side rather than lifting up. Your ear should approach your shoulder as your body rotates. One goggle stays in the water. Your mouth barely clears the surface, catching air from the pocket created by your head pushing through the water.
This technique feels strange at first. Many swimmers worry they will swallow water if they do not lift their head higher. Trust the process. With proper timing and a quick inhale, you will get all the air you need without disrupting your body position.
One Eye In, One Eye Out
A helpful cue for proper head position is “one eye in, one eye out.” When you turn to breathe, one goggle lens should remain submerged while the other clears the surface. This keeps your head low and your hips up.
In open water swimming, this position has an added benefit. You can sight forward while breathing by looking slightly forward with your upper eye. This helps with navigation without needing a separate sighting stroke that disrupts your rhythm.
Breathing Patterns: Every 2, 3, or 5 Strokes
How often you breathe directly impacts your stroke efficiency and endurance. There is no single right answer for everyone, but understanding your options helps you choose the best pattern for your goals.
Breathing Every 2 Strokes (Unilateral)
Breathing every 2 strokes means you breathe to the same side every time. This pattern provides the most oxygen and is often the most comfortable for beginners. It allows you to establish a consistent rhythm and focus on technique without worrying about air.
The downside is that you only develop technique and rotation to one side. Over time, this can create imbalances in your stroke muscles. Many unilateral breathers also tend to over-rotate to their breathing side, which can cause cross-over at the front of their stroke.
Breathing Every 3 Strokes (Bilateral)
Breathing every 3 strokes means you alternate sides, breathing right, then left, then right. This bilateral breathing pattern is the gold standard for balanced stroke development. It ensures symmetrical muscle development and rotation to both sides.
For triathletes and open water swimmers, bilateral breathing is essential. It allows you to breathe away from waves, avoid looking into the sun, and sight on both sides for navigation. In pool swimming, it helps you maintain a straighter line by balancing your stroke.
The challenge is that breathing every 3 strokes requires better breath control. You have less frequent access to air, so your exhale technique must be solid. Many swimmers start with breathing every 2 strokes, then gradually incorporate bilateral breathing as their comfort level improves.
Breathing Every 5+ Strokes (Hypoxic)
Advanced swimmers sometimes use breathing patterns of every 5, 7, or more strokes. This hypoxic training builds lung capacity and tolerance to CO2 buildup. Sprinters often use limited breathing in races to maintain maximum speed and minimize stroke disruption.
For most recreational swimmers and triathletes, breathing every 5 strokes is unnecessary and can be counterproductive. Only attempt extended breathing patterns after you have mastered consistent bilateral breathing and have no signs of panic or breathlessness.
Choosing Your Pattern
If you are a beginner, start with breathing every 2 strokes to your most comfortable side. Focus on technique first. Once you can swim 200 yards comfortably without stopping, begin practicing breathing every 3 strokes. Alternate patterns within workouts: breathe every 2 during warm-up, every 3 during technique sets, and return to every 2 when fatigue sets in.
Remember, the goal is sustainable swimming. Choose the pattern that allows you to maintain good technique for your target distance. For most triathletes in open water, bilateral breathing every 3 strokes provides the best balance of oxygen access and stroke symmetry.
Common Breathing Mistakes That Slow You Down
Based on forum discussions with hundreds of swimmers and my own coaching experience, here are the most common breathing errors and exactly how to fix them.
Mistake 1: Holding Your Breath Underwater
This is the number one problem I see in adult learners. You take a breath, put your face in, and hold that air until you turn to breathe again. By then, CO2 has built up and your body is panicking.
Fix: Exhale continuously from the moment your face enters the water. Practice blowing bubbles in the shallow end until it becomes automatic.
Mistake 2: Lifting Your Head to Breathe
When you lift your head forward or up, your hips sink. You create drag and make every subsequent stroke harder.
Fix: Practice the one-eye-in rule. Your head should roll with your body rotation, not lift independently. Look sideways, not up or forward.
Mistake 3: Breathing Too Late
Some swimmers wait too long to start their breath, then rush it at the last moment. This disrupts stroke timing and often leads to swallowing water.
Fix: Your breath should happen during the natural body rotation of your stroke. Start the head rotation as your pulling arm finishes its pull. The breath is complete before your recovering arm enters the water.
Mistake 4: Over-Rotating
Swimmers often think they need to rotate their body 90 degrees to breathe. This excessive rotation disrupts stroke rhythm and makes it harder to return to a balanced position.
Fix: You only need about 45-60 degrees of rotation to get your mouth clear of the water. Focus on rotating from your hips and core, not your shoulders alone.
Mistake 5: Breathing Every Stroke
Breathing to the same side every single stroke creates imbalances and disrupts stroke timing. It also prevents you from developing the breath control needed for longer distances.
Fix: Practice breathing every 3 strokes at least part of the time. If you must breathe every 2 strokes during hard efforts, alternate sides every length or every few lengths.
Troubleshooting Quick Reference
Problem: I feel out of breath after 25 yards.
Solution: Focus on continuous exhalation. You are likely holding your breath.
Problem: My hips sink when I breathe.
Solution: Keep your head lower. Rotate, do not lift. One goggle should stay in the water.
Problem: I swallow water when breathing.
Solution: Time your breath earlier in the stroke rotation. Exhale completely so you can inhale quickly.
Problem: I get panicked in the water.
Solution: See the anxiety management section below. Focus on relaxation and gradual exposure.
Managing Panic and Anxiety While Breathing
This section addresses a topic most swimming guides ignore: the mental side of breathing. After reading countless forum posts from adult learners who quit freestyle due to panic, I believe this is one of the most important parts of learning to breathe properly.
One Reddit user shared a story that resonated with me. They stopped swimming freestyle entirely because they could not breathe without panicking. They switched to backstroke and breaststroke, missing out on the efficiency and enjoyment of freestyle. This does not have to be your story.
Understanding Panic Breathing
Panic breathing is a cycle. You hold your breath underwater, CO2 builds up, your body signals distress, you feel anxious, and your breathing becomes even more erratic. Breaking this cycle requires both physical technique and mental control.
First, recognize that the sensations you feel are normal. The urge to breathe comes from CO2 buildup, not oxygen deprivation. Your body has plenty of oxygen even when you feel desperate for air. Understanding this helps you stay calm.
Calming Techniques for the Water
Start every swim session with relaxation exercises. Stand in the shallow end and practice bobbing, exhaling underwater and inhaling above. Focus on making your exhale slow and controlled. This establishes the breathing pattern before you add the complexity of swimming.
If you feel panic building during a swim, stop and recover. Hold the wall, take slow deep breaths, and let your heart rate come down. There is no shame in stopping. Swimming is a lifelong sport, and taking time to build confidence is smarter than pushing through panic.
Use positive self-talk while swimming. Many swimmers silently count strokes or repeat mantras like “blow bubbles” or “relax” with each breath. This keeps your mind focused on technique rather than anxiety.
Progressive Exposure for Adult Learners
If breathing while swimming causes significant anxiety, use a progressive approach. Start with drills that keep your face in the water but allow easy access to air, like side kicking with one arm on a kickboard. Gradually increase the distance between breaths as your comfort grows.
Swim near the wall or lane line so you can stop anytime. Knowing you have an escape route reduces anxiety. As your confidence builds, move to the middle of the lane.
Consider working with a coach or joining an adult learn-to-swim class. Having someone watch your technique and provide feedback removes the guesswork. Many triathlon clubs offer beginner-friendly sessions specifically designed for adults overcoming swimming anxiety.
5 Drills to Perfect Your Freestyle Breathing
Drills isolate specific skills so you can build them without the complexity of full swimming. These five drills progress from basic comfort to advanced technique. Master them in order.
Drill 1: Bobbing
Purpose: Establish comfortable exhalation underwater.
How to do it: Stand in chest-deep water. Take a breath, submerge your face, and exhale slowly through your nose and mouth. Come up for a quick inhale, then repeat. Focus on making your exhale last the entire time you are underwater.
Progression: Start with shallow bobs, then go deeper. Try to exhale continuously from the moment your face submerges until it breaks the surface.
Drill 2: Side Kicking
Purpose: Practice body position and head position while breathing.
How to do it: Hold a kickboard with your bottom arm extended. Lie on your side with your face in the water, bottom ear down. Kick gently. When you need to breathe, rotate your head just enough to get your mouth clear while keeping one goggle in the water.
Progression: Start with the kickboard for support. As you improve, try side kicking without the board, extending your bottom arm forward and resting your top arm at your side.
Drill 3: Catch-Up Drill
Purpose: Extend the time between breaths while maintaining stroke balance.
How to do it: Swim freestyle, but keep one arm extended forward while the other arm completes its entire stroke. The stroking arm “catches up” to the extended arm before they switch. This creates a longer glide phase and forces you to be patient with your breathing.
Progression: Start with a 2-beat kick (one kick per arm stroke). Focus on a continuous exhale during the extended glide. Breathe to the side of the arm that is pulling.
Drill 4: Single Arm Drill
Purpose: Isolate body rotation and breathing timing.
How to do it: Hold one arm at your side while swimming with the other arm only. Breathe to the side of the arm that is stroking. This exaggerates the body rotation and helps you feel how your head should rotate with your torso.
Progression: Start with your non-working arm extended forward for balance. As you improve, keep it at your side. Switch arms every 25 yards.
Drill 5: Hypoxic Training Sets
Purpose: Build comfort with longer intervals between breaths.
How to do it: Swim with a specific breathing pattern that gradually extends the time between breaths. For example: breathe every 3 strokes for 25 yards, then every 5 strokes for 25 yards, then every 7 strokes if comfortable.
Progression: Only attempt this drill after you have mastered continuous exhalation and bilateral breathing. Stop immediately if you feel dizzy or panicked. Never practice hypoxic training without a coach or lifeguard present.
Frequently Asked Questions
How do you breathe during freestyle swimming?
Breathe during freestyle by exhaling continuously underwater through your nose and mouth, then rotating your head to the side (not lifting it) as your body naturally rotates during the stroke. Take a quick inhale when your mouth clears the surface, keeping one goggle in the water. Time your breath with your stroke cycle, breathing as your arm completes its pull.
Is it better to exhale through nose or mouth when swimming?
Most swimmers use both nose and mouth for exhalation. The nose helps prevent water from entering your nasal passages, while the mouth allows for more forceful exhalation when needed. Try gentle bubbles through your nose during most of the stroke, then a stronger final exhale through your mouth right before turning to breathe.
What is the 4 7 8 rule for breathing?
The 4-7-8 breathing technique involves inhaling for 4 counts, holding for 7 counts, and exhaling for 8 counts. While this technique works well for relaxation on land, it is not practical for swimming freestyle. In swimming, focus on continuous exhalation underwater rather than holding your breath, as holding breath causes CO2 buildup and panic.
How to stop gasping for air while swimming?
To stop gasping, focus on exhaling continuously from the moment your face enters the water. Most gasping comes from holding breath underwater, which causes CO2 buildup. Blow bubbles steadily while swimming so your lungs are nearly empty when you turn to breathe. This allows for a quick, calm inhale instead of a desperate gasp.
How often should you breathe in freestyle?
Beginners should start by breathing every 2 strokes to one side for maximum oxygen access. As technique and comfort improve, progress to bilateral breathing every 3 strokes for balanced stroke development. Advanced swimmers may use patterns of every 5 strokes for specific training purposes. Choose the pattern that allows you to maintain good technique for your target distance.
Putting It All Together
Learning how to breathe while swimming freestyle is a journey, not a destination. I still focus on my breathing technique in every practice, constantly refining the basics that make swimming enjoyable instead of exhausting.
Start with the fundamentals: continuous exhalation underwater, head rotation instead of lifting, and timing your breath with your stroke. Practice the drills in order, building comfort before adding complexity. Be patient with yourself, especially if you are overcoming anxiety in the water.
Remember that the swimmers who make freestyle look effortless are not working harder than you. They are working smarter, using proper technique to work with the water instead of against it. With consistent practice of the principles in this guide, you will get there too.
Your next step is simple: get in the water and practice. Start with bobbing to establish your exhale. Move to side kicking to feel proper head position. Then put it all together in your freestyle stroke. Every lap you complete with good breathing technique builds the muscle memory that will carry you through longer distances.
Happy swimming, and remember to blow those bubbles.